Set Grouping and Summarization
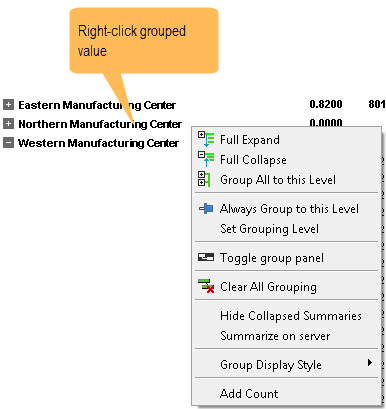
Once you Group and Summarize your Layout, you can fine tune how you want the grouping to look. For this topic, you will right-click the group row as follows:
| To | Do this |
|---|---|
| Show all details | Click Full expand. |
| Collapse all details to the top group level | Click Full collapse. |
| Collapse all details to a given group level | Click Group all to this level. |
| Always collapse details to a given group level | Right-click the desired group node. Click Always Group to this level. All groups will be collapsed and set to the same level as the group node that you right-clicked. |
| Set the collapsing of details to a specific level | Click Set grouping level. On the resulting dialog, enter the group level to collapse to. If you use the up/down arrows, the grid will show you a preview of the rollup. |
| Set page break at a specific level | Click Set grouping level. On the resulting dialog, check Page Break and select the level. When you export your report (to pdf or Excel) or do an Automatic Presentation, your report will page break at the group level you selected. |
| Clear all grouping | Click Clear grouping. |
| Hide/Show summaries on the collapsed group row | Click Hide to hide. Click Show to show the summaries. |
| Show the value only for the group row label | Default. Click Group Display Style |
| Show the category and value for the group row label | Click Group Display Style |
| Show only the text portion of a label in the form number.text | Click Group Display Style |
| Show the group row at the top or bottom of the details | Click Group Display Style |
| Add a quick count to the group row | Click Add Count. To remove the count, click Remove Count. |
| Automatically suppress rows that summarize to zero at the lowest grouping level | From the Design menu, select Suppress Zeroes. If checked, then the grid will hide any row where all visible summary values of regular and calculated columns for the lowest grouping level are zero. |